
Floating Frame Technique
- Carol Read

- Apr 5, 2019
- 3 min read

Hello everyone and Welcome. I had mentioned Yesterday that I wanted to try out the floating frame technique. Like I said it has been pretty popular on the different stamping groups I'm on and I thought it would be fun to give it a try. Warning.....This post is going to be sort of long but the good news is that I photographed my process so that should make it easier to understand my explanations. So hang in with me and I hope you can follow what I'm trying to explain. Hahahaha I started out with the Best Catch stamp set. I stamped all the images in Momento black ink and then colored them in using the Stampin' Blends. Now you can use whatever you like but this is what I did.

Once I had them stamped and colored in I used the matching framelits and cut all my images out. If the set you want to use doesn't have framelits then you can easily just fussy cut them (hand cut) out.

Once they were all cut out I took a layer of whisper white cardstock that I cut to 4 x 5.25 and I arranged all my cut out images onto the white layer...
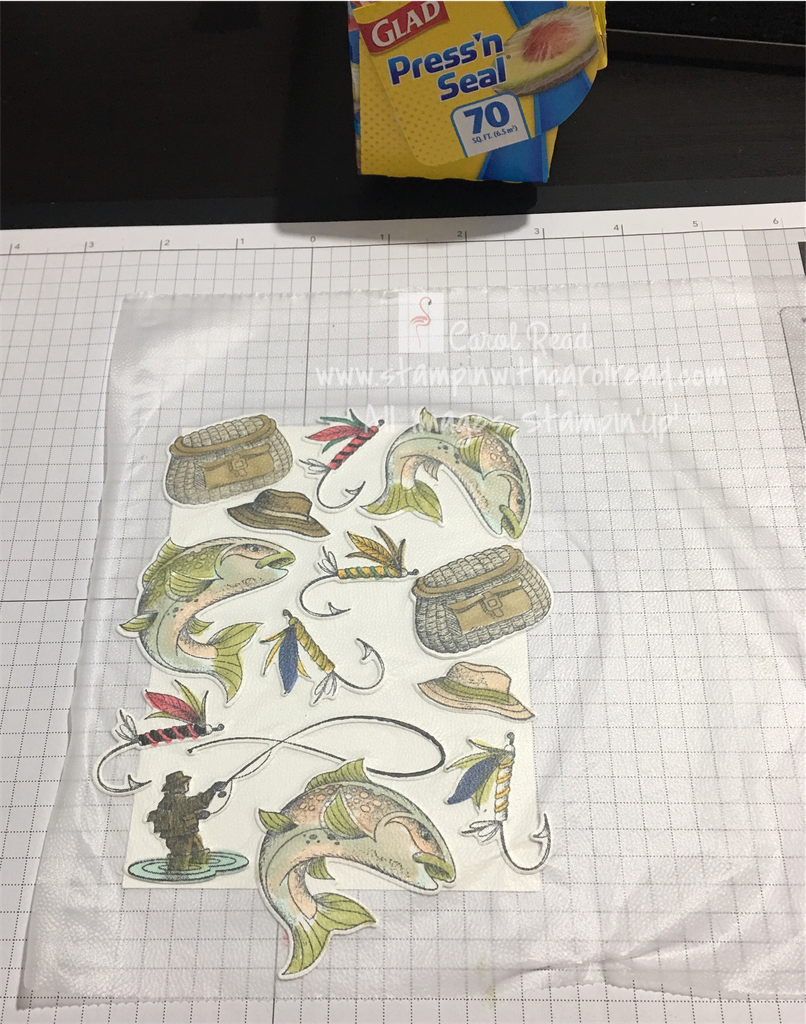
Once I was pleased with my layout I then took a piece of Glad Press and Seal and carefully laid it over the whole thing. Gently pressing it to the images so that they stayed in the arrangement I had created.

Next I trimmed the edges with scissors to make everything the size of the 4 x 5.25 layer. That way any overhanging images were trimmed straight off the sides.

I then placed my rectangle framelit in the center and secured it down with some washi tape to keep it in place while I ran it through the Big Shot.

So I ended up with something like this....I set the center cut aside. You can use this on a second card if you like. I wasn't excited about how the images in the center came out so I haven't done anything with mine yet. I still might but we'll see. So for now just set it aside.

I then very carefully peeled the white backing layer from the image frame leaving the images stuck to the press and seal. I flipped it over with the back side facing up and added some stampin dimensionals to the backs of all the pieces. Note: I had some super small slices that I didn't bother with. I just used the ones that were large enough to get a dimensional on the back.

So once that part was done.....I grabbed another piece of whisper white that I trimmed to 4 x 5.25 and carefully centering the frame on it I stuck it down. This step gives you that floating 3D look. If I had overhang from not getting it perfectly center I just used my scissors again and trimmed to fit.

I stamped the sentiment in the center of the frame with a coordinating color of ink. Now if you were using anything but a manly set you could stick down some sequins or rhinestones maybe some enamel dots. But I didn't have anything that would stick with the manly theme so I went with just adding some Linen Thread for an embellishment.

You can perk it up anyway you'd like...but I thought the thread worked with the fishing theme. Up to you!

So I took that whole layer and I placed it on a card base of Crumb Cake cardstock that I cut to 11 x 4.25 and scored at 5.5.
Whew....I hope this made sense and you were able to follow along. If you need more info like maybe a video then you can search YouTube for Floating Frame Technique and you should be able to fine some.
I have seen this done with some of our awesome floral sets and they turn out just gorgeous. So if fishing isn't your thing be sure to try it out with some flowers. Then you could add in some bling and it makes it so pretty. I was just in need of a manly card so I went with the Best Catch.
Thank You so much for stopping in. I'll leave a product list below if you need to know what products were used. I'm not going to detail out each color of blends but if you really need to know a certain color ask me and I'll give you that info.
Give this technique a try and let me know what you think of it. Have a great Day.....
HAPPY STAMPING...CAROL


Comments